
The Japan Trip Planning Order at a Glance
You do not need to follow a fixed “six months before” calendar. A traveler booking next month and someone planning next year can use the same order, then adjust how quickly each stage needs to be completed.
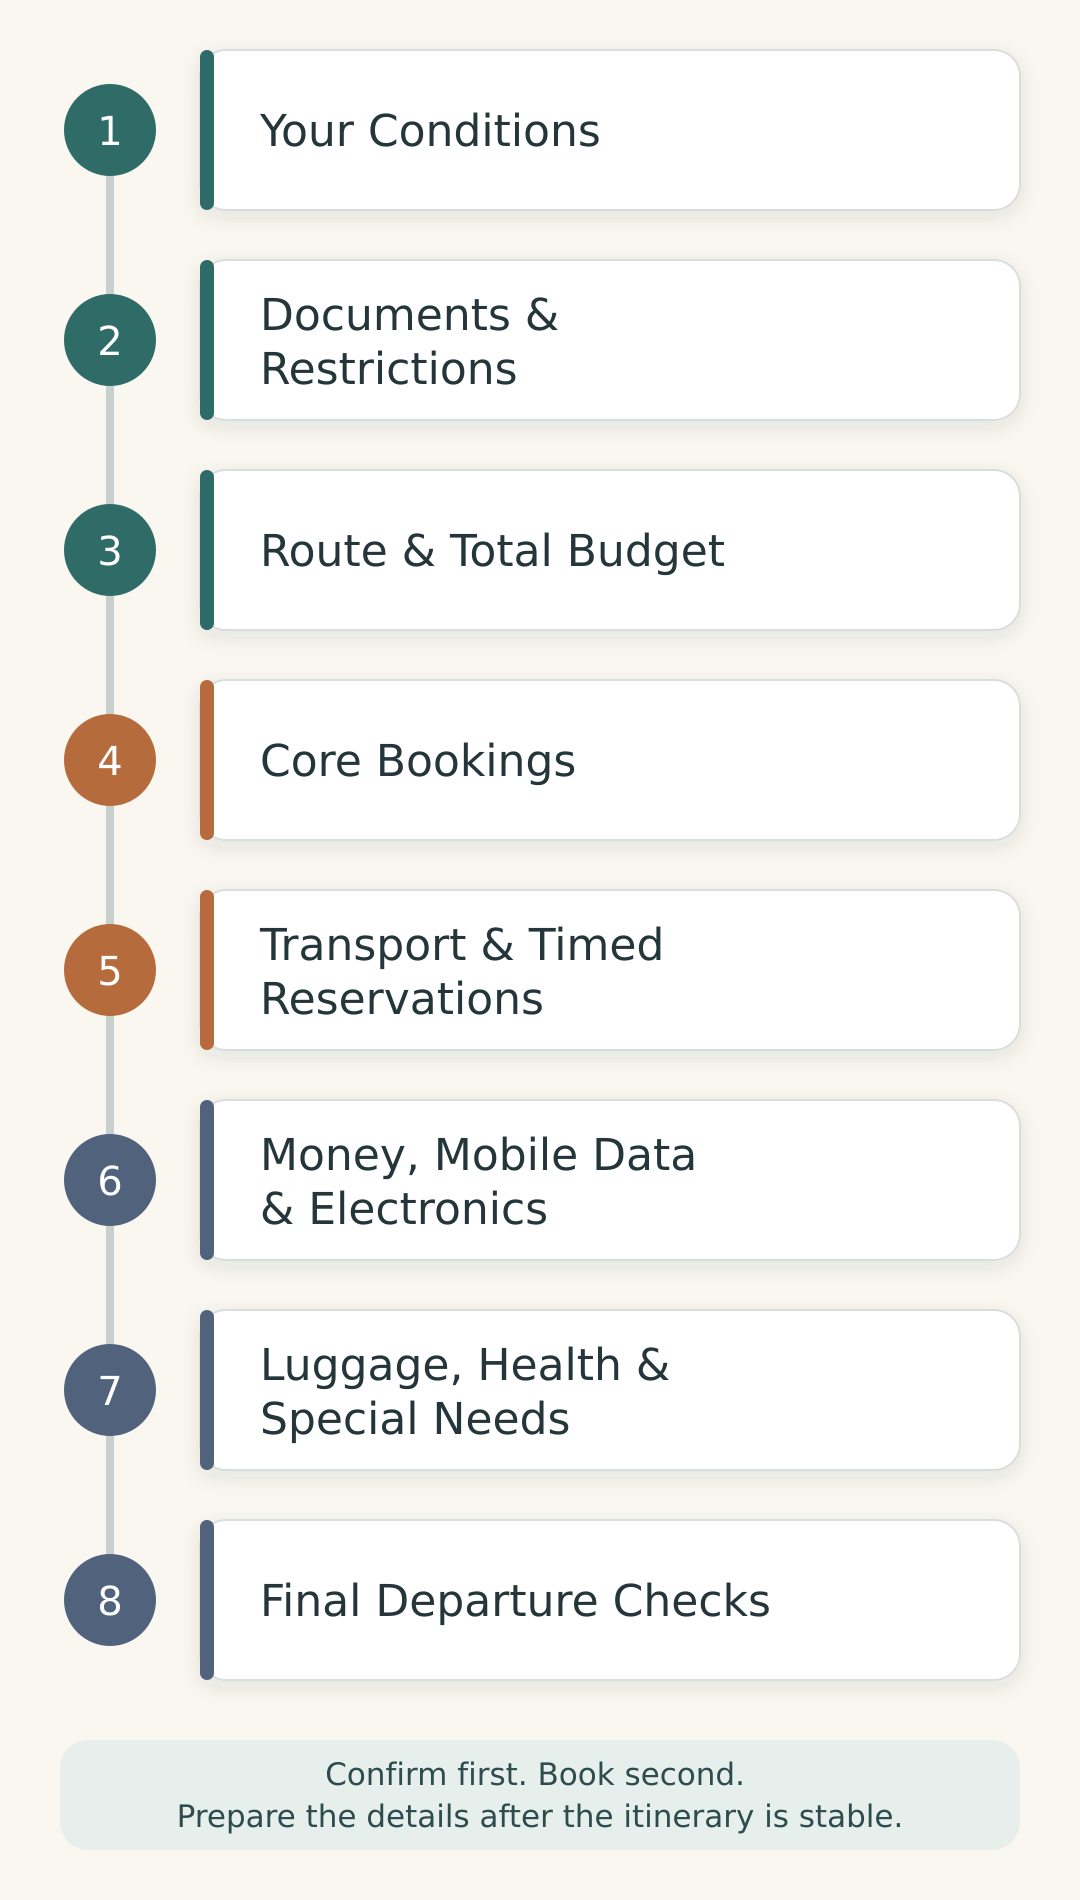
| Stage | Decide or check | Why it comes now |
|---|---|---|
| 1 | Your dates, pace, companions, needs, and priorities | These are the conditions only you can answer |
| 2 | Passport, visa, transit, medicine, child, and driving requirements | Resolve restrictions before non-refundable spending |
| 3 | Route, accommodation bases, and total budget | Flights, hotels, trains, and luggage depend on the trip shape |
| 4 | Flights, accommodation, insurance, and first-night access | These bookings define the journey |
| 5 | Intercity transport and time-sensitive reservations | Book only after the route is realistic |
| 6 | Payments, mobile data, and electronics | Set up the systems you will use every day |
| 7 | Luggage, health, accessibility, and family needs | Match practical preparation to the confirmed itinerary |
| 8 | Arrival procedures and final offline backups | Finish tasks that require confirmed booking details |
1. Start With the Conditions Only You Can Answer
Before comparing products or booking sites, write down the conditions that no travel guide can decide for you. These will determine which recommendations actually fit.
- Your possible travel dates and trip length
- Who is traveling, including children or older family members
- Your comfortable total budget range
- How quickly you like to travel
- Whether you prefer major cities, regional destinations, or both
- How much luggage you expect to carry
- Mobility, dietary, religious, or medical requirements
- Whether shopping, food, culture, nature, theme parks, or nightlife matters most
You do not need a detailed day-by-day itinerary yet. You need enough clarity to avoid building a trip that conflicts with your own pace or needs.
2. Check Documents and Restrictions Before Booking
Complete this stage before making non-refundable purchases. Entry and transit requirements depend on nationality, passport type, residence, trip purpose, and length of stay, so another traveler’s answer may not apply to you.
Passport, Visa, and Transit
- Check that your passport will remain valid for the trip and that the booking name matches it exactly.
- Confirm whether you need a visa using the Ministry of Foreign Affairs visa information.
- Check the entry or transit requirements of every country where you will change planes, even if you do not plan to leave the airport.
- If you are using JAPAN eVISA, follow the official display instructions. The Visa Issuance Notice must be shown as directed online; a screenshot or printed copy is not accepted.
If a visa or other approval is required, treat it as a prerequisite rather than a final pre-departure task. Refundable bookings may reduce financial risk while an application is pending, but always check the actual cancellation conditions.
Medicine, Children, and Driving
Some medicines that are legal in another country are controlled in Japan. Check the active ingredient and quantity, not only the brand name. Japan’s Ministry of Health, Labour and Welfare explains when an Import Confirmation may be required.
輸入確認証 / Yunyū kakunin-shō / Import Confirmation is the term you may see in this process. Controlled narcotics and stimulants follow separate rules, and some substances cannot be brought into Japan even when prescribed elsewhere.
Families should confirm airline and border-document requirements for children, especially when a child is traveling with one parent or another guardian. If you plan to drive, check which foreign driver’s license, International Driving Permit, or official translation Japan accepts before reserving a car. The National Police Agency provides official guidance for foreign driver’s license holders.
Customs and Quarantine
Check before packing food, plants, seeds, meat, or other animal products. An item being sealed, commercially packaged, or accepted by the airline does not automatically make it admissible to Japan. The Ministry of Agriculture, Forestry and Fisheries publishes separate official guidance for meat and animal products and plants and plant products.
This stage establishes what is permitted or required before you commit to the trip. Stage 7 returns to medicine, mobility, family needs, and luggage only after the route is confirmed, so you can adapt the practical arrangements to the journey you will actually take.
3. Set Your Route and Total Budget
A Japan trip budget should be built around the route, not around a single daily-spending figure. A slow week in one city and a week crossing the country can have similar food and hotel costs but very different transportation costs.
Sketch the Route Before Pricing Individual Deals
Choose the likely arrival airport, departure airport, and overnight bases. Then identify the journeys that connect them. An open-jaw flight, arriving in one city and leaving from another, may reduce backtracking, although the airfare must still be compared with a return ticket and the cost of returning to the first airport.
Season affects the route, clothing, crowds, weather risks, and accommodation availability. If your dates are still flexible, compare these factors in our Best Time to Visit Japan guide before committing to flights.
Choose a Small Number of Useful Bases
For most first trips, staying several nights in a base is easier than changing accommodation every day. It reduces packing, check-in time, and luggage transfers, while giving you time to understand the station and the neighborhood around your stay.
Accommodation location shapes more than commuting time. It affects where you buy breakfast, what the walk home feels like, whether you can return for a midday rest, and how easily you can take a day trip. A room that looks cheaper may not be better value if every journey begins with a difficult transfer or a long walk with luggage.
Once you know which parts of Japan interest you, use our Japan destination guides to compare possible bases and understand what each region or city contributes to the route. Choose accommodation only after those priorities are clear.
Build the Budget in Separate Layers
| Budget layer | What to include | Planning note |
|---|---|---|
| International travel | Flights, airport transport at home, checked baggage, seat fees, visas | Compare the final fare, not only the advertised ticket price |
| Accommodation | Room rate, taxes or fees, breakfast, cancellation terms | Price the location as well as the room |
| Long-distance travel | Shinkansen, limited express trains, domestic flights, highway buses, rental car | Keep this separate from local daily transport |
| Daily spending | Local transport, meals, drinks, small admissions, laundry | Multiply only after estimating your travel style |
| Trip-specific costs | Theme parks, tours, special meals, luggage delivery, mobile data, insurance | Add only what actually applies to your itinerary |
| Shopping and personal spending | Souvenirs, tax-free purchases, optional upgrades | Do not hide this inside the food or emergency budget |
| Contingency | Rebooking, replacement items, an unexpected taxi, medical excess | Keep access to backup funds separate from everyday spending |
Price the route, flights, and realistic accommodation options together before deciding that the trip fits your budget. A cheap flight can be a poor deal if it requires an airport hotel, expensive baggage, or a late-night taxi. The same principle applies to a remote hotel that adds time and fares to every day.
4. Book the Core Parts of the Trip
Once the route and budget work, book the parts that would be difficult to replace. For most independent travelers, that means international flights and accommodation first, followed by insurance and any essential domestic flight or rental car.
Flights
- Confirm the local arrival date, not only the departure date from home.
- Check connection times, terminal changes, and whether checked baggage is transferred.
- Compare change, cancellation, seat, and baggage conditions.
- Check how the arrival time fits the final train, bus, or check-in time at the first accommodation.
Accommodation
Compare the route from the station or bus stop to the actual entrance, especially with luggage. Check the station exit, walking surface, late check-in procedure, front-desk hours, luggage storage, bed setup, and cancellation policy.
For a city stay, a well-connected base with groceries, breakfast, and somewhere pleasant to walk can make an ordinary morning part of the trip. For a rural stay or 旅館 / Ryokan / Traditional Japanese inn, the meal schedule, pickup service, and last transport may matter more than being close to a major station.
A central, rail-connected stay is a practical default for many first-time visitors. Choose a different base when a theme park, rural experience, ryokan stay, family visit, event, accessibility need, or quiet neighborhood is more important than citywide convenience. The right location is the one that improves the days you actually plan to spend.
Travel Insurance
Compare insurance before or when you make major non-refundable payments. Check medical costs, emergency transport, trip cancellation or interruption, delays, baggage, pre-existing conditions, planned activities, and rental-car cover where relevant. Do not assume a credit card automatically covers the whole trip.
For most visitors, the practical default is to travel with verified medical and emergency-assistance coverage. If you plan to rely on a credit card or an existing policy, confirm the eligibility, limits, exclusions, and payment process rather than assuming the cover applies.
If you are not sure what coverage you already have or whether you need a separate policy, our Do You Need Travel Insurance for Japan? What to Check Before You Go guide explains how to check existing medical coverage first and compare additional insurance only if there is a real gap.
The right level of cover depends on the policy terms and your circumstances. Keep the insurer’s emergency contact details and claim instructions available offline.
Your First Journey After Landing
Plan all the way from the airport to the accommodation door. “Take the train to Tokyo” is not a complete arrival plan if you still need to find another railway, climb station stairs, or walk 15 minutes after a long flight.
5. Plan Transport and Time-Sensitive Reservations
Do not buy a Japan Rail Pass before mapping the journeys it would cover. First decide which type of transportation makes sense for each part of the route. If you are still choosing between trains, Shinkansen, buses, taxis, rental cars, flights, or ferries, use Getting Around Japan: Which Transportation Should You Use? before moving on to tickets and reservations. Do not reserve every local train; separate everyday city travel from the long-distance journeys that may need a specific ticket or seat.
| Journey | Practical default | Reserve early when… |
|---|---|---|
| Local train, subway, or compatible bus | Use an IC card where accepted | Usually no reservation is possible or needed |
| Shinkansen | Buy the required Shinkansen ticket for the journey | You have fixed plans, a group, a peak-period trip, or oversized baggage |
| Limited express train | Check whether a limited express ticket or seat is required in addition to the basic fare | The service has limited seats or is important to the itinerary |
| Domestic flight | Compare it with rail using door-to-door time | The route or fare is central to the trip |
| Highway or overnight bus | Use it when price or an overnight journey matters more than flexibility | The route is popular or has limited departures |
| Rental car | Use it where public transport does not fit the route | Vehicle type, child seats, snow equipment, or one-way return is important |
Arrange the Right Ticket or Reservation
For local transport, a 交通系ICカード / Kōtsū-kei IC kādo / Transit IC card is the practical default where compatible. For 新幹線 / Shinkansen / Bullet train and 特急 / Tokkyū / Limited express journeys, arrange the ticket and any seat reservation required for that service instead of assuming a normal IC-card tap covers the whole journey. How to Pay for Train Travel in Japan explains the basic ticket pattern.
Use How to Buy Shinkansen Tickets in Japan once the route and dates are known. Calculate the covered journeys before buying a pass; Japan Rail Pass: Is It Worth It? A Complete Guide explains when the nationwide pass is worthwhile and when individual tickets make more sense.
Plan Around Large Luggage
On the Tokaido, Sanyo, Kyushu, and Nishi Kyushu Shinkansen, baggage with total dimensions of more than 160 cm and up to 250 cm requires the appropriate oversized-baggage reservation. Confirm the current rule and eligible seat when booking through the operator. JR Central’s official oversized-baggage information explains the system.
Reserve Experiences Only When Advance Booking Has a Purpose
Book early when an attraction can sell out, entry is date-specific, a seasonal event has limited capacity, or the experience is central to the trip. Theme parks, popular museums, observation decks with timed entry, special trains, restaurant counters with few seats, and small-group cultural experiences can fall into this category.
Ordinary neighborhood meals, flexible sightseeing, local trains, and backup activities can usually wait. Leaving some space makes it easier to respond to weather, tiredness, or a place you discover after arrival.
Once you know which experiences matter most, use the guide below to choose a booking service, compare packages, and check what you will need on the day.
6. Set Up Money, Mobile Data, and Electronics
Prepare More Than One Way to Pay
For most first-time visitors, the practical combination is an overseas-enabled card, a backup card kept separately, some Japanese yen, and an IC card for compatible local transport and small purchases. Cards are widely useful, but cash still matters at some small businesses, temples, markets, rural services, and machines.
- Confirm international use, fees, withdrawal limits, and the card PIN.
- Know how to freeze a lost card and contact the issuer from overseas.
- Keep at least one backup payment method somewhere separate.
- When a terminal or ATM offers conversion, check the rate and fees; paying or withdrawing in Japanese yen is usually the clearer choice.
- Do not keep your entire emergency budget as cash in one wallet.
Cash or Credit Cards in Japan? How to Pay During Your Trip explains how cards, yen, ATMs, and IC cards fit together.
Choose Mobile Data After Checking the Phone
First confirm whether the phone supports eSIM and is unlocked for another carrier. For a typical short trip, an eSIM is often the simplest default because it can be installed before departure and does not require collecting or replacing a physical card.
Choose a physical SIM if the phone is unlocked but does not support eSIM. Roaming may be simpler for a very short stay when the home carrier’s cost is acceptable. Pocket Wi-Fi can suit a group sharing several devices, but someone must carry, charge, collect, and return it.
For a detailed comparison of these options and practical recommendations by trip length and use, read How to Stay Connected in Japan: eSIM, SIM Card, Roaming or Pocket Wi-Fi.
Download essential apps, offline maps, and translation data before the flight. Save the first accommodation address and arrival route somewhere that does not depend on mobile reception.
Check Plugs, Voltage, and Batteries
Japan uses Type A plugs with two flat parallel pins and 100-volt AC electricity. Eastern Japan uses 50 Hz and western Japan uses 60 Hz. A plug adapter changes the shape of the plug; it does not change the voltage.
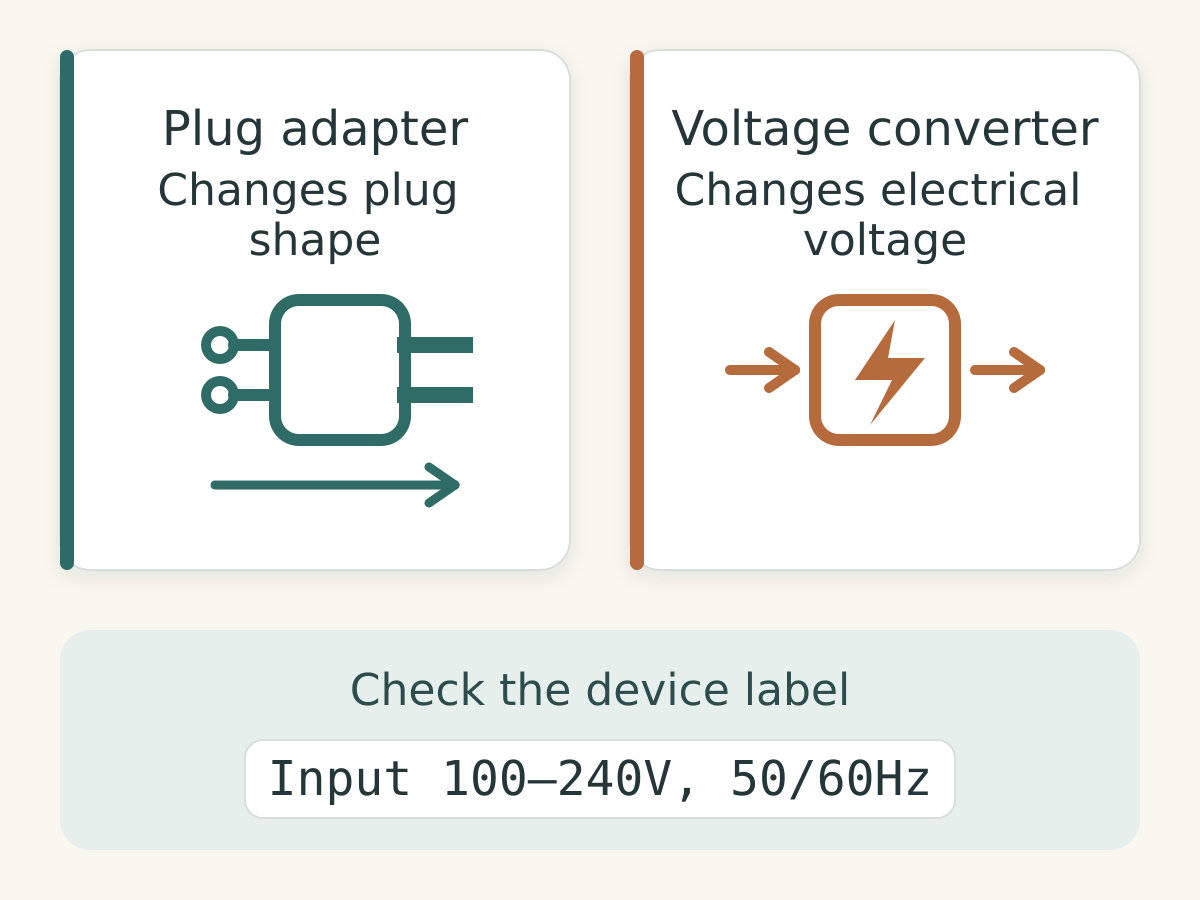
Check the label on every device or charger. Equipment marked “Input 100–240V, 50/60Hz” can normally handle Japan’s supply with the correct plug shape. Single-voltage hair tools and other high-power appliances deserve special care; use a suitable converter only when the manufacturer confirms it is appropriate.
Power banks and spare lithium batteries belong in carry-on baggage, not checked baggage. Capacity limits and onboard-use rules can change or vary by airline and country, so check every operating carrier before packing.
7. Plan Luggage, Health, and Special Needs
Stage 2 checked the legal and entry restrictions that could affect whether you can travel. Now use the confirmed route, accommodation, and transport plans to make the trip workable for your luggage, health, mobility, and family needs.
Choose Luggage for the Itinerary, Not the Airline Limit
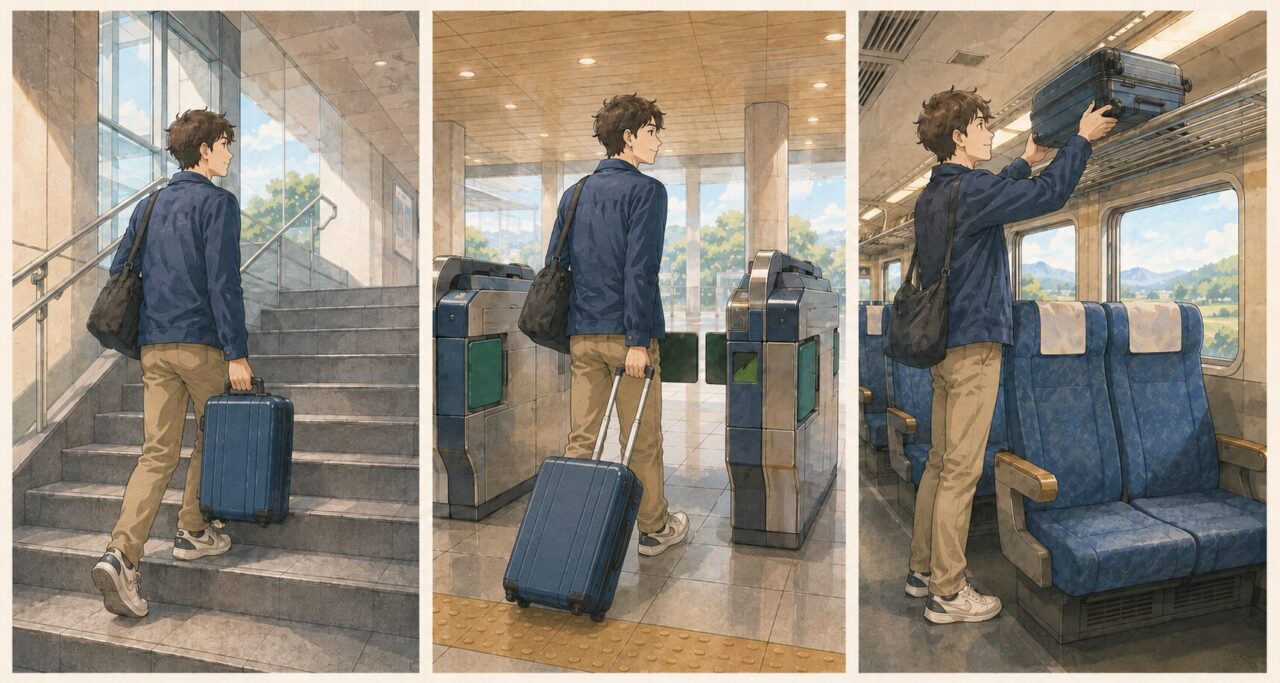
For a multi-city rail trip, one suitcase you can manage without help plus a day bag that can hold essentials for a short stay is a practical default. The goal is not to use the smallest possible suitcase. Choose enough capacity for the trip, but avoid taking more luggage than you can lift, steer, and move without assistance. The largest bag your airline allows may be awkward on station stairs, crowded local trains, hotel corridors, and short transfers.
On a longer itinerary, pack for the interval between laundry stops rather than every day of the trip. Luggage delivery and a small overnight bag can also let the main suitcase skip a short stop instead of following you through every station.
- Compare the airline’s cabin and checked-baggage size, weight, and fee rules.
- Measure the suitcase before booking Shinkansen seats that may require an oversized-baggage area.
- Check whether every accommodation can hold luggage before check-in or after check-out.
- Pack a small overnight bag if sending the main suitcase ahead.
- Leave room for purchases without making the bag difficult to lift.
Use Luggage Delivery When It Removes a Difficult Transfer
宅配便 / Takuhaibin / Luggage delivery service can be useful between airports, hotels, and some other staffed locations. Delivery is not instant, so confirm the cutoff time, arrival date, address, and whether the receiving accommodation will accept the bag. An apartment-style stay without a staffed front desk may require a different arrangement.
If an unstaffed apartment cannot receive luggage, consider sending the suitcase to a staffed hotel later in the route or arranging collection at a nearby delivery-company service center. Confirm that the office accepts this type of delivery and check its opening hours, identification requirements, and holding conditions before sending the bag.
Coin lockers are useful for short storage but may fill at busy stations and may not fit very large cases.
For hotel-to-hotel forwarding, airport delivery, coin lockers, unstaffed stays and Shinkansen baggage rules, see our guide to luggage delivery in Japan.
Prepare Health, Accessibility, and Family Details
Pack medicine in accordance with Japan’s rules and keep a list of active ingredients, doses, allergies, and important medical information. If food allergies are serious, prepare a clear Japanese explanation rather than relying on a restaurant to infer the risk from a preference.
Review routine vaccinations and reputable travel-health advice early enough to act before departure. Seek individual medical guidance when pregnancy, age, immune status, a chronic condition, or planned activities could change what preparation is appropriate.
Contact transportation providers and accommodation early if you need step-free access, a specific bed arrangement, medical refrigeration, a cot, child seat, or other support. “Near the station” does not guarantee a step-free route, and a station may have several exits with very different accessibility.
Choose clothing and shoes after checking the season and destinations. A warm day in Tokyo does not tell you what to pack for a mountain area, snowy region, or long day of walking on temple paths.
8. Complete the Final Pre-Departure Checks
Once the flight and accommodation details are final, complete the tasks that depend on confirmed information. This is also the time to create an offline backup for the first day.
Complete Arrival Procedures
Visit Japan Web lets travelers prepare immigration and customs information online. Complete it through the official Digital Agency service, check that the details match your travel documents, and make sure you can display the 2D code after landing. Visit Japan Web is not a visa and does not replace entry eligibility.
Create One Offline Travel Folder
- Passport and required visa or permission details
- Flight numbers, terminals, and booking references
- Insurance certificate, policy number, and emergency contact
- First accommodation name, address, phone number, and check-in instructions
- Airport-to-accommodation route, including a backup option
- Important train, attraction, and transfer reservations
- Medicine permissions and prescription information where applicable
- Card issuer, airline, and emergency contacts
For accommodation and other places that may be difficult to find, save the name and address in Japanese script and romanized form, together with a map pin. A short English note can help you remember the entrance or nearest station, but the Japanese address is usually the most useful version to show locally. Two terms worth recognizing are 住所 / Jūsho / Address and 予約番号 / Yoyaku bangō / Booking reference.
Check the Trip as It Now Exists
- Complete airline check-in when available and recheck baggage rules.
- Confirm the weather for each region, not only the arrival city.
- Check transportation notices and official safety information.
- Install and test the eSIM or prepare the physical SIM without disabling the home number by mistake.
- Confirm cards are ready for overseas use and place the backup separately.
- Recheck the first and final airport journeys.
- Tell a trusted person how to reach you and where the key itinerary is stored.
Japan’s weather and transportation conditions can be highly local. Our guide to natural disasters in Japan explains what to prepare and which official information to follow if conditions change.
Prepare in Order, but Leave Room for the Trip
A well-prepared Japan trip is not one where every hour has been reserved. It is one where the difficult decisions have been made in the right order: restrictions before spending, route before rail passes or transport reservations, accommodation before airport transfers, and device checks before buying connectivity.
Once those dependencies are settled, leave room for an unplanned neighborhood meal, a slower morning, or a change of route. Preparation should make the trip easier to experience, not turn it into a schedule you are afraid to change.
Last verified: September 13, 2026 (JST). Entry rules, transport reservations, airline baggage rules, and digital services can change. Recheck the official information that applies to your nationality, carrier, route, and travel dates.
Frequently Asked Questions
- When should I start planning a trip to Japan?
-
Start as soon as your dates are realistic, especially for peak seasons or a trip built around a specific event. The exact month matters less than the order: resolve documents and restrictions, then set the route and budget before making major bookings.
- What should I book first for a trip to Japan?
-
After checking entry and transit requirements, settle the route and total budget. Then book the parts that define the trip, usually international flights and accommodation, followed by insurance and any essential domestic flight, rental car, or time-sensitive reservation.
- Do I need to reserve Shinkansen seats before arriving in Japan?
-
Not for every journey, but advance reservations make sense for peak periods, groups, fixed connections, preferred seats, and oversized baggage. Reservation windows and rules differ by route and service, so check the operator once your itinerary is set.
- What can wait until after I arrive in Japan?
-
Flexible neighborhood meals, ordinary local transport, and backup activities can usually wait. Reserve before departure only when a fixed date, limited capacity, peak travel period, essential connection, or special requirement makes availability important.
- Should I buy a Japan SIM or eSIM before departure?
-
Buying before departure reduces the number of tasks after landing. An eSIM is usually the simplest choice for a typical short trip if the phone supports eSIM and is unlocked; otherwise consider a physical SIM, roaming, or pocket Wi-Fi according to the device and group size.
- Do I need a plug adapter or voltage converter for Japan?
-
You may need a Type A plug adapter if your device uses a different plug. A converter is a separate device and is needed only when the equipment cannot accept Japan’s 100-volt supply; check the input label and manufacturer guidance.
- Is Visit Japan Web mandatory?
-
No. Visit Japan Web is not mandatory and does not determine whether you are eligible to enter Japan. It is the official online service for preparing immigration and customs procedures, and Japan Customs recommends using it for electronic customs declarations. If you do not use it, follow the procedures available at your arrival airport.